2024 Blog Post Checklist Cheat Sheet to Rank Every Time

A lot goes into creating an informative, interesting, and engaging blog post. You spend hours researching, drafting, and editing and are proud of the final product.
But then, no one sees it.
It doesn’t rank on search engines or generate any traffic to your website. What a waste of time and energy!
But we have a solution!
To save you time (and sanity), we’ve put together a blog post checklist, with all the key elements you need to do for writing the perfect blog post every time. This one-page PDF covers everything you need to do before hitting publish, including keyword research, internal linking, and promoting your post on social media.
Follow this checklist every time you write a blog post and increase your chances of getting ranked and driving traffic to your website.
Here’s what you need to include in every post and increase your chances of success:
Step 1: Do Keyword Research
Keywords are the core of all your blog posts. They act as signposts for both your readers and search engines.
But, you can’t just stuff any old keyword into your blog post and call it a day.
Keyword research is crucial for understanding which keywords will be most effective in driving traffic to your blog post.
Brainstorm a list of potential words and key phrases that apply to your niche. Make sure you’re thinking about the intent behind the search, too. For example, someone searching for “dog food” is likely looking to buy dog food, whereas someone searching for “how to make dog food” may look for a recipe.
Once you have a solid list, use Bramework’s keyword analyzer tool to finalize your choices. Select keywords with high search volume and low competition to increase your chances of ranking.

Include your chosen keywords in the title, headers, and throughout the body of your blog post for maximum impact.
Step 2: Choose a Topic
Your blog topic helps you zero in on what you want to say in your blog post. Choosing a topic beforehand saves you time by giving you a specific focus, and it makes your blog post more likely to be successful because you’re writing on a topic that people want to read about.
How to choose a blog topic
A good way to come up with a blog topic is to think about the questions people ask that your blog post can answer. AnswerThePublic is a great tool – it provides a list of questions related to your chosen keyword based on what people are searching for online.
You can also check out popular blog posts in your niche or use social media monitoring tools to see what kind of content is performing well with your audience.
For example, you’re writing a blog post about social media marketing for small businesses, which is a broad topic, so focus on a specific subtopic you can cover in-depth. Some ideas you can explore might be: “5 social media tools every small business needs” or “how to manage your social media presence as a solopreneur.”
Create SEO-Optimized Blog Posts with First Draft PRO in Minutes!
👋 Say Goodbye to Endless Hours of Research and Writing
Step 3: Create your title
Don’t judge a book by its cover.
Maybe.
But people definitely judge blog posts by their titles. Your title helps people decide whether they want to read your post. Creating a catchy and informative title will help you get more clicks and, ultimately, more readers.
How to create a good blog title
A catchy blog title allows you to answer a question, solve a problem, or teach your audience something new. Keep it within 70 characters, so it doesn’t get cut off in search engine results, and make sure it accurately reflects the content of your blog post. Be specific enough to cover it adequately in a single blog post.
For example, instead of a generic title like “social media tips,” try something more specific and valuable to your readers, like “how to increase engagement on Instagram in 3 steps.”
Another way you can create a good blog title is by using Bramework’s free title generator tool.

Once you have a headline, use CoSchedule‘s headline analyzer to see how well it performs and make any necessary tweaks.
🔍 Find Keywords That Actually Drive Traffic
Stop guessing and start ranking. Discover high-value keywords, analyze trends, and dominate your niche free and fast.
Step 3: Outline your article
What’s the best way to make sure you cover everything you want to in your blog post? Create an outline.
A blog is much easier to write if you break it down into smaller, more manageable pieces. An outline helps you organize your thoughts and figure out what you want to say before you start writing. This makes the actual writing process much smoother.
There are different ways you can create an outline for your blog post. Some people prefer to do it the old-fashioned way. Others like to use Bramework’s blog post outliner.

A general blog outline for a blog post should include an introduction, H2s for each section, and a conclusion. If your H2s are lengthy, break them down into smaller H3s for subheadings.
Step 5: Write or Dictate Your Blog Post
The quality of your writing directly impacts your blog post’s success.
A well-written blog post is easier to read and understand. It keeps readers engaged and increases the likelihood of sticking around until the end.
Break up your paragraphs into smaller chunks, use headings and subheadings, and include images to make your blog post visually appealing. An active voice and a conversational tone will also make your blog post more enjoyable to read.
If you struggle with writing, try dictating your thoughts instead. You can use tools like Google’s Speech-to-Text to transcribe your words into a blog post and edit from there.
Step 6: Add Original Research
Quotes from subject matter experts, stats from recent reports, and screenshots from your data all contribute to making your blog post stand out. Original research adds credibility to your blog and helps establish you as a thought leader in your industry.
Make sure whatever research or data you’re including is current and relevant to your blog post. When citing sources, provide links to the source material.
Step 7: First Edit
There’s always room for improvement, even if you think your blog post is perfect. That’s why it’s important to edit your blog post.
The first edit lets you fix any major errors. It also gives you a chance to improve the overall quality of your writing.
Use tools like Grammarly, ProWritingAid, and Hemingway Editor to help you fix any major errors in your blog post.

Note that these tools may not catch everything, so it’s important to read your blog post yourself and make any necessary edits.
Step 8: Walkway
Once you’ve finished your first edit, take a break for a couple of days.
A break allows you to come back to your blog post with fresh eyes, which makes it easier to spot any remaining errors. You also may have new ideas for improving it, and you’ll be able to think more critically about it.

Step 9: Final Edit
Repeat your editorial process and make any final changes before publishing your blog post.
Check for grammar, spelling, and punctuation errors one last time, and ensure your blog post flows well and is engaging. Remove any filler words and tighten up your language to make it concise and clear.
Step 10: Find Photos to Support the Article
Make sure you have some supporting evidence for everything you’ve written in your blog post. Embedding relevant photos to the blog post is a great way to liven up your blog post, and help make your blog post more visually appealing and interesting.
If you’re using Bramework, you can pull photos right from Unsplash into your article.

Instead of just stock photos, consider adding screenshots, charts, or graphs to support your points. If you’re using images from another source, properly credit them and include a link to the source.
Step 11: Add Relevant ALT Text to Images
Add relevant ALT text to all the images you use in your blog post. ALT text helps visually-impaired individuals understand the content of your images, and it also helps with SEO.
ALT text should accurately describe the image and include any relevant keywords for the blog post.
For example, if you have a photo of a laptop with a Word document open, the ALT text could be “laptop with Word document open showing blog post outline.”
Step 12: Make Links Sponsored or Open in New Tab Based on the Type of Link
If you’re linking to another website in your blog post, do it based on the type of link. If it’s a sponsored link, make sure it opens in a new tab. This way, people won’t be taken away from your blog post if they click on it.
Ensuring the link opens in a new tab also helps preserve the layout and design of your blog post. If it’s a non-sponsored link, you can choose whether to have it open in a new tab or not.
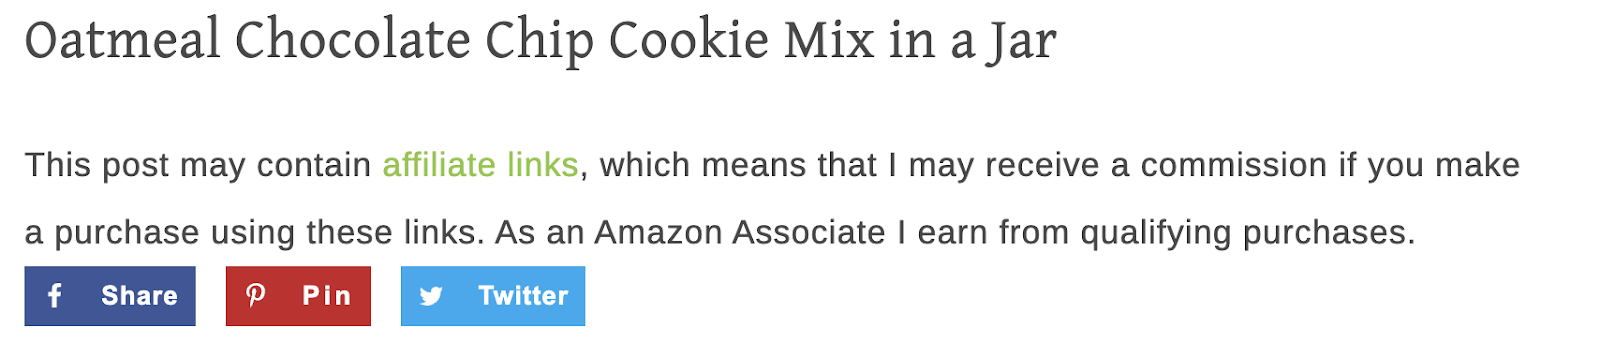
Step 13: Add a Disclosure Statement Before the First Affiliate Link in Your Article
If you’re adding affiliate links to your blog post, make sure you have a disclosure statement before the first one. You want to be upfront and transparent with your readers and you also don’t want them to feel like they’re being tricked into clicking on a link.
A disclosure statement lets readers know you’re an affiliate for the product or service, and if they click on the link, you’ll make a commission. This way, they can decide for themselves if they want to click on the link or not.
Here is an example below of what that may look like:
Step 14: Have an Email Subscription CTA in Your Blog Post
Make sure you have an email subscription CTA in your blog post, allowing people to subscribe to your email list.
A CTA to subscribe to your email list helps you continue building a relationship with readers and growing your audience. It also gives you an opportunity to send them additional content, updates, and promotions.
Step 15: Add Meta Description
Your meta description gives people a taste of what your blog post is about and entices them to click on it.
A compelling meta description makes people want to read your blog post, and learn more about what you have to say. Include keywords in your meta description so it ranks higher in search engines.
Step 16: Adjust Permalink
Permalink allows you to customize the URL of your blog post.
This is important for two reasons.
First, it helps with search engine optimization (SEO). Second, it makes your blog post more visually appealing, which can help encourage people to click on it.
Use keywords in your permalink, and ensure it’s short and to the point.
Step 18: Add Categories, Tags
Categories and tags make it easier for people to find your blog post. It also helps with SEO, as it tells search engines what your blog post is about.
Think of it like a filing system for your blog posts, which adds more structure and organization to your blog post. Add as many categories and tags as you want, but make sure they apply to your blog post.
Step 19: Check all links
The frustration of a broken link.
We’ve all been there. You’re reading an article, and you click on a link, only to be taken to a 404 page.
Checking all links is an important step. It shows your readers that you’re taking the time to publish quality content and that you care about their experience. This not only helps to build trust but also helps to encourage people to come back to your website.
It’s also a good idea to regularly refresh your blog posts to update them and check for broken links.
Step 20: Final Review/Preview
A review helps you catch any mistakes you may have made, and it also allows you to see your blog post from a different perspective.
Readers often pick up on things you didn’t, so getting a second opinion is important. Reviewing your blog post also lets you make sure that it flows well and that all of your points are clear and that the flow of your article makes sense and the images work well with that flow.
Step 21: Publish
Now it’s time to set your blog post live to the world! Hitting publish means people interested in your post will see your post. In return, these people may share your blog post with their friends or even link it on their website. They may also reward you with their feedback, which can help you improve your writing.
Step 22: Market Content
Publishing your blog post is not the end, it’s just the beginning for marketing. Marketing your content is the best way to ensure that people see it and that it gets the attention it deserves. The more people see your blog post, the more traffic you’ll get to your website.
Promoting your blog post on social media, email marketing, or even reaching out to industry influencers are great ways to market your content and attract readers.
A few tried-and-true methods that always work well are:
- Promote via social media channels
- Include in your email newsletter
- Answer questions on Quora
- Link to your post in another blog post
Final Thoughts
A great blog post is the result of careful planning and execution. No matter how experienced you are as a writer, you’ll always benefit from having a clear plan to follow.
By following the blog post checklist given in this article, you can be sure you’re covering all your bases and hitting all the key points. So take your time, do your research, and create something you’re proud of. Your readers will thank you for it!
If you want to save this list, download our blog post checklist here to get a shortened PDF of all these steps so you can easily access it and refer to it.


