How To Write an AMAZING Blog Post Outline: 2024 Step-by-Step Guide


Are you ready to learn how to write a blog post outline quickly and easily? Don’t worry, I got you!
If you didn’t know, a blog post outline is a great way to help you get your ideas organized and create an incredible writing guide for your blog post.
Without an outline, chances are that you won’t be able to create a concise text that provides the best possible value to your reader. We all know that this would then lead to lower traffic and engagement for your website.
AND, we definitely don’t want that!
Readers online often read very fast because they’re looking for a specific piece of information, which is also why organizing your article clearly and efficiently is a great idea.
What’s the BEST Way to Create Your Blog Outline?
The best way to go about creating an outline is to create a mind map. That way you can have one central point from which all of your ideas can expand. You can use this mind map as a basis to create your outline.
Your basic outline should look like this:
- Introduction: This is where you introduce yourself and your topic and provide a hook to entice the reader into reading the rest of your blog post.
- Body of the text: This is where you expand on your idea, provide interesting ideas to make the reader think and organize your points into subsections to make the blog post clearer.
- Conclusion: Your conclusion lets you summarize your main points and include the so-called “CTA”. This is elaborated on below.
As you can see, this is a good place to start when learning how to write a blog post outline.
It can be intimidating to write a blog post for the first time, but if you follow the steps mentioned below, you will see it’s actually quite fun. Before you start writing your blog post, you will need to know the following:
Step 1: Keyword Research and Analysis
Keyword research and analysis is the process of identifying and categorizing keywords for use in SEO (Search Engine Optimization) and PPC (Pay Per Click) campaigns. It is by far THE MOST IMPORTANT step in your blog outlining process.

Create SEO-Optimized Blog Posts with First Draft PRO in Minutes!
👋 Say Goodbye to Endless Hours of Research and Writing
Keywords are broken down into two MAIN categories:
- Volume: The volume indicates the total number of searches that’s researched each month on a particular keyword, such as “dentist” or “car insurance.” You want your volume to be as high as you can get it for your keyword, but with a low difficulty.
- Difficulty: The difficulty of a keyword shows just how competitive a certain search phrase is and how hard it will be for you to rank for it. The closer it is to “100,” the harder it will be to rank for it.
The Challenges with Keyword Research
When you’re doing your keyword research, you should also take into account the difficulty of each keyword.
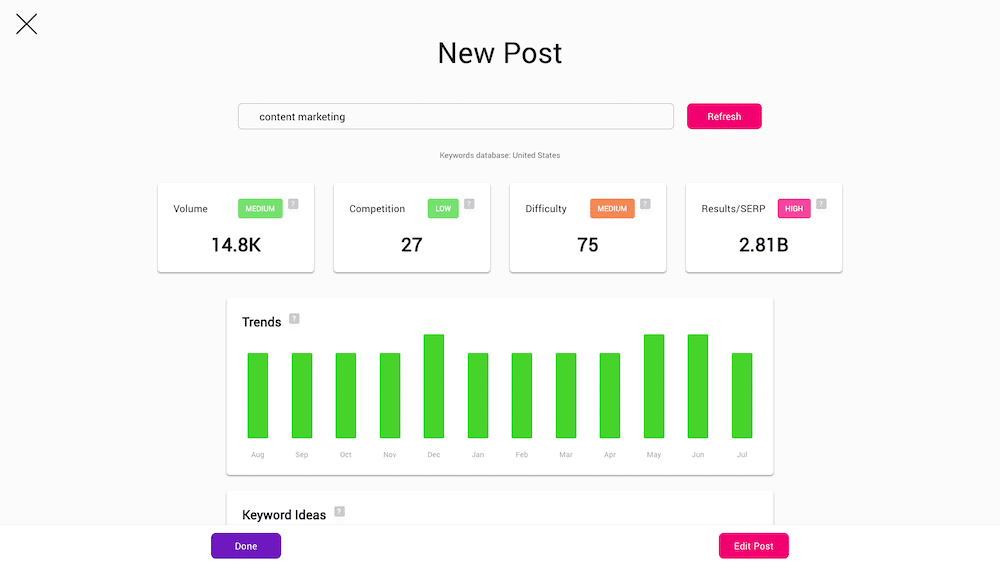
More difficult keywords have a lower conversion rate, but they are still relevant to the topic of your blog post. This is why including both higher volume and mid to low difficult keywords are important, since each has a chance of bringing a new audience to your blog post.
The higher your blog post ranks on search engines, the more likely you are to generate a lot of traffic and become a successful blogger as a result. This is why you SHOULD NEVER underestimate the power of keyword research.
🔍 Find Keywords That Actually Drive Traffic
Stop guessing and start ranking. Discover high-value keywords, analyze trends, and dominate your niche free and fast.
Step 2: Choose the Best Blog Post Title
Once you have determined the topic of your blog post, you need to choose a title for it. The title should be no more than 70 characters.
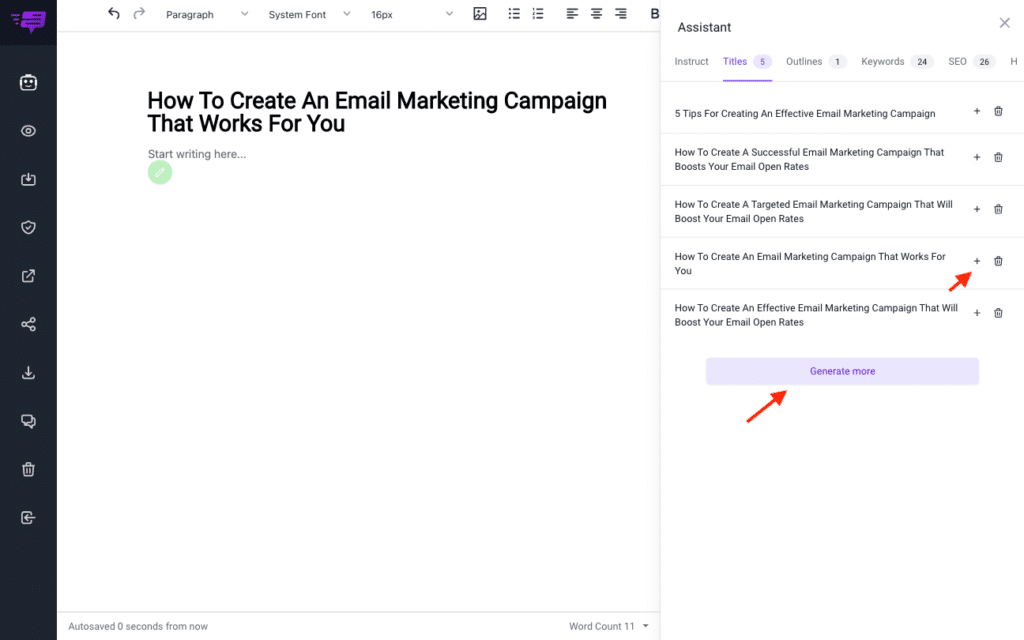
This is because popular search engines like Google will only display the first 70 characters of a title, and if you write something longer, the headline might not make sense to the reader.
Why You Need to Spend Time Working on Your Blog Title
The way you phrase your headline always depends on the topic you write about. There are some titles that have a high chance of attracting readership, though, no matter what your topic is – they offer a solution to a problem.

Using “how” and “why”, as well as numbers, questions and information that’s personal to your audience will all benefit your headline.
Here are a few examples of blog listicle articles:
- 21 Ways to Repurpose Content
- 10 BEST Sushi Spots You Have to Try in Orlando, Florida
- 11 Business Blogging Best Practices
- 15 Steps to Build Brand Awareness for your Business
Here are a few examples of blog “how to” articles:
- How to Build Links and Partnerships with your Blog
- How to Write Faster: 21 Best Tips to Increase Productivity
- How to Get From Epcot to Hollywood Studios (6 Easy Ways to Get to the Disney Parks)
- How to Convert Social Media to Sales for Your Business
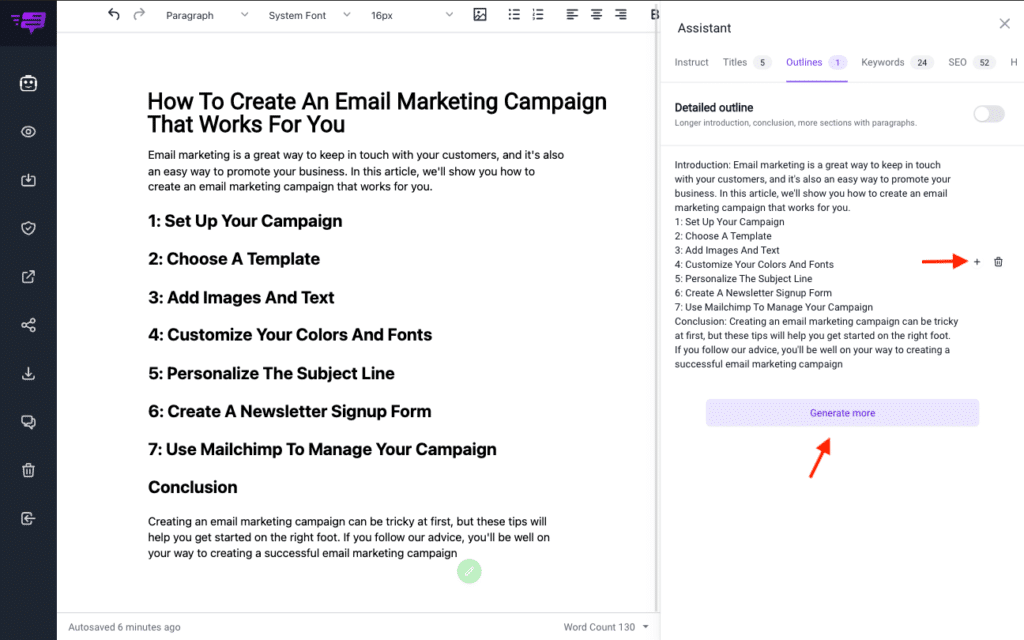
Step 3: Outline Your Blog
Now we’re at the fun part, the outline. Your blog outline will be the backbone of your blog. It is the map that will help you to navigate through your blog post.
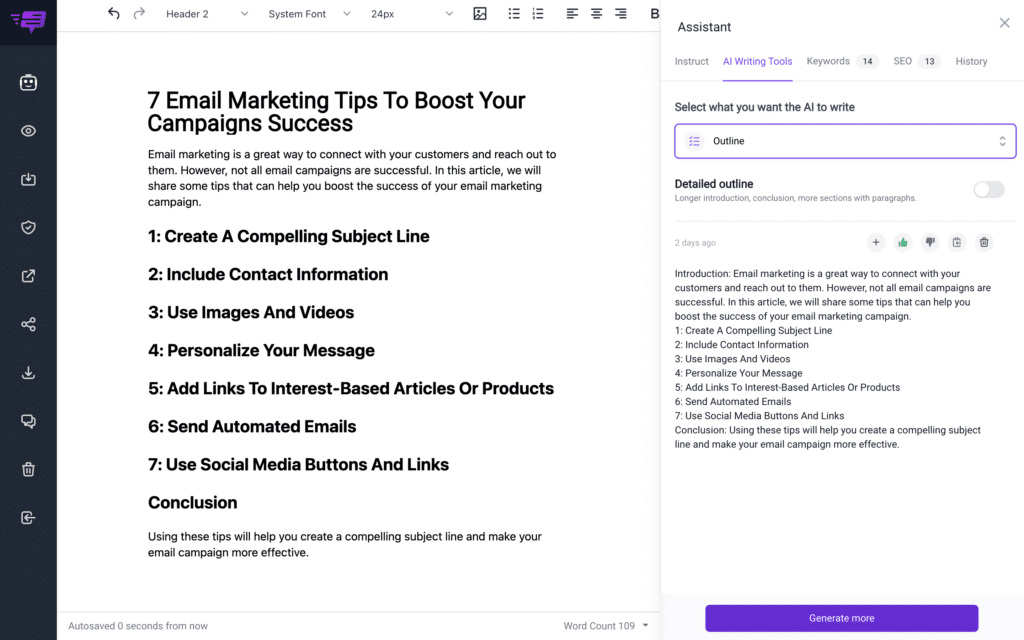
The outline should contain all of the main points that you want to address in your blog post. It is a good practice to write your outline first, and then develop the first draft.
This is the Blogging Framework for Your Blog Post Outline:
- Introduction
- 5 to 10 Main Points You Want to Make in the Article (can be tips, steps, questions, etc.)
- 2 to 5 Sub-Points of Your Main Points (research to backup your main points)
- Conclusion (add a Call-To-Action to end your article)

This way, you will make sure that you have covered all the topics that you want to write about in your blog post, and you won’t have to rewrite too much.
However, it’s also important to stay true to yourself. The writing process is a creative endeavor, and if you suddenly feel like you want to include something you haven’t thought of before, put it in.
You can think it all through later on when you’re polishing your piece during the editing process.
When you’re in the middle of writing your first draft, though, it is always better to include everything that comes to your mind, even if it slightly diverges from the blog outline.
Step 4: Update Links, Metadata and All Things SEO
It is important to update your links and metadata to make sure that your website is still getting traffic and that your website is still ranked in search engines.

The internet world changes extremely quickly, trending hashtags and keywords keep racing with each other, and as a blogger, you always have to try to stay in the race as well.
This is why updating your links, keywords, photos and titles is essential. Oh, and make sure your bio on your blog is up-to-date as well!
Step 5: Conclude and Add Your CTAs
After you summarize your blog post in the conclusion, it’s a great idea to include your CTA, which stands for “Call-to-Action”.
This means that at the very end of your blog post, you can ask your viewers to subscribe to your newsletter, like your page on Facebook, check out your website or buy your products.
Whatever you’re trying to promote, make sure to ask politely and not appear too pushy, as that would discourage your readers from clicking on the provided links.
When it comes to CTAs, you have to ask yourself, “What do I want my viewers to do after they finish reading my article?” and “How do I encourage them to do that while staying true to myself?”
Step 6: The Final Step
The final step is to take a few minutes to review your blog post for any errors or typos that might have been overlooked. You can also add any important links that might be helpful for your readers, such as the link to your social media sites.
Don’t SKIP this Step (Interlinking Your Blog Posts)
And if you have a blog with many different blog posts on it, why not interlink between them?

If you briefly mention an experience in a post, you can link this to a previous blog article that expands on this experience in detail. An interested reader will click on the link in order to read another story of yours, which will result in more traffic overall.
When you finish your article, it’s a good idea to let it rest for a bit, even if only for half an hour. A break in writing will give you the clarity you need to go through the editing process with a fresh perspective.
This is where you polish your blog post properly and correct any mistakes you’ve made, making your blog post the best it can possibly be.
Final Thoughts on Learn How to Write a Blog Post Outline
Although, this is not an exhaustive list of tips, it’s a good place to start on your journey of learning how to write a blog post outline. I hope you enjoyed this guide and I hope it helped you!
(Original Article Date: January 26, 2022/Updated October 3, 2022)
🎓 Join the Ultimate Blog Ranking Academy!
Unlock the Secrets to a $10,000 per-month Blogging Income