🔥 FLASH SALE: Blog to Video is HERE! Plus Analytics AI & Chat Builder. Only 50 licenses left at $179 👉 Claim Your Lifetime Deal!
Step by Step Guide: How to Write a Perfect Blog Post with Bramework

Now that you’ve officially become a blogging pro with Bramework, it’s time for me to take you through the steps to making the first draft of your blog post using the AI Content Generator Assistant.
Step-by-Step Guide to Creating a Blog Post with Bramework
I’m going to give you my full process (as a blogger) using Bramework’s AI writing assistant to show you how to go from a blank page to a fully written article.
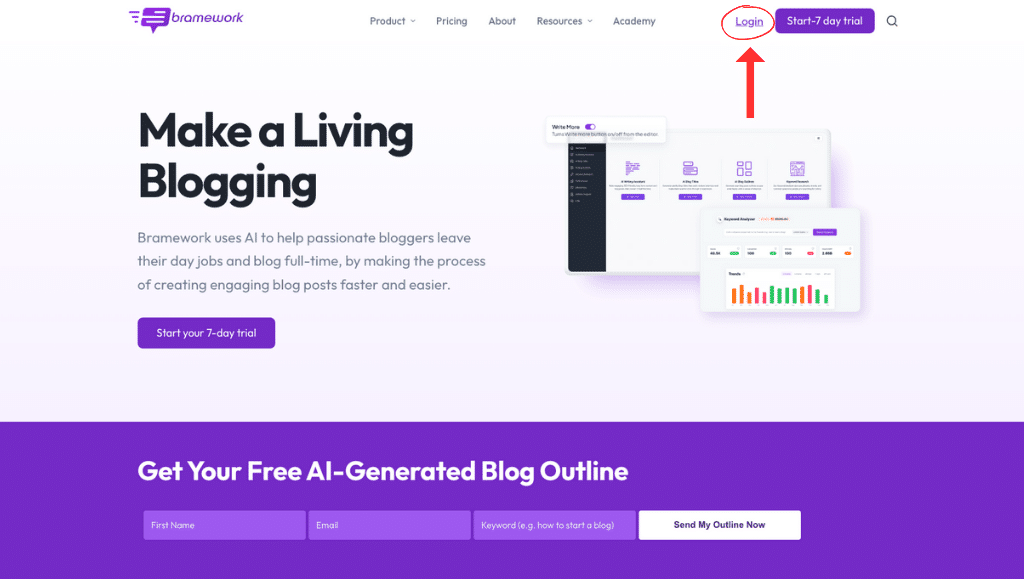
1st Step: Sign into Bramework.
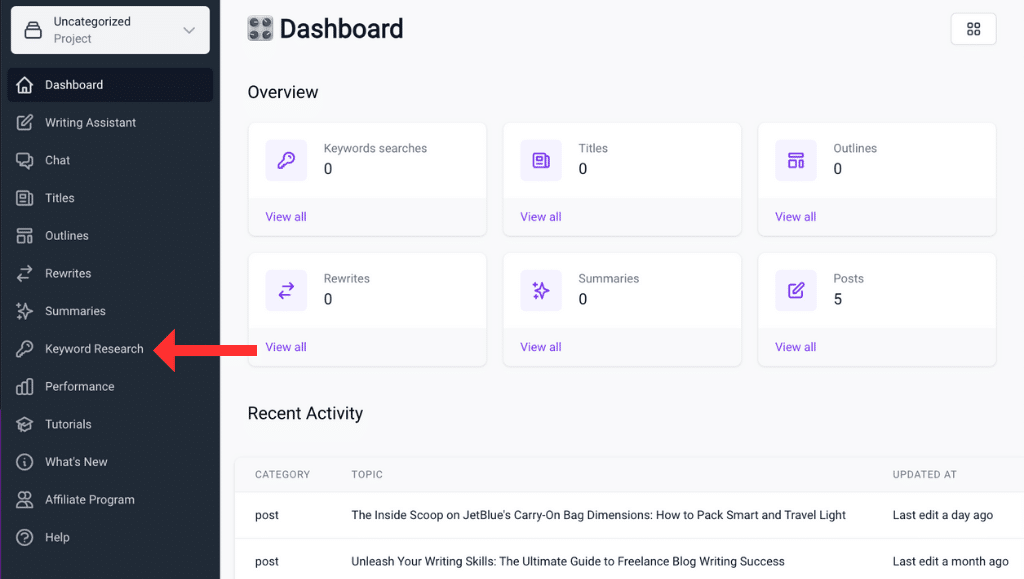
2nd Step: Select Keyword Research Tab.
Create SEO-Optimized Blog Posts with First Draft PRO in Minutes!
👋 Say Goodbye to Endless Hours of Research and Writing
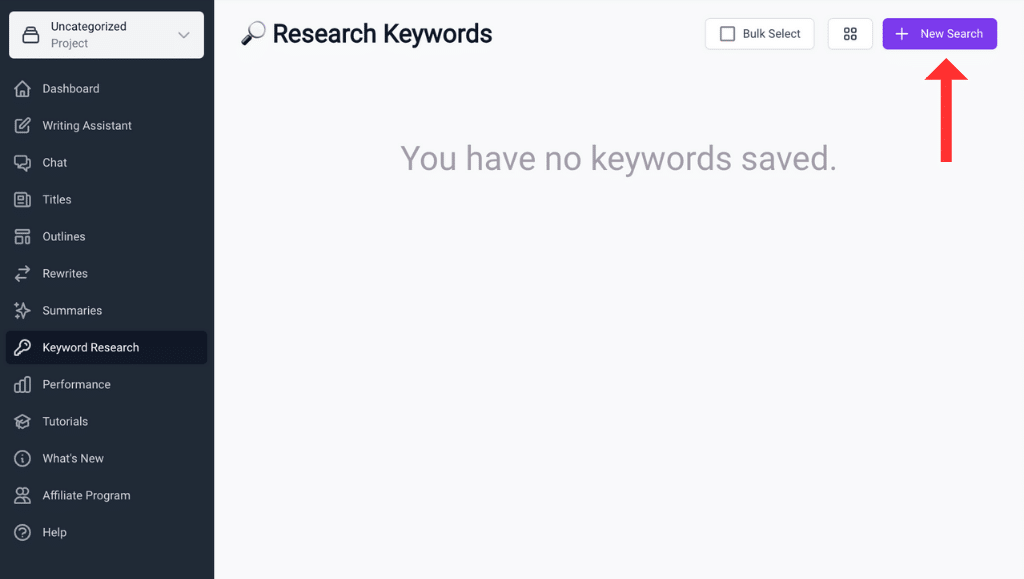
3rd Step: Select New Search.
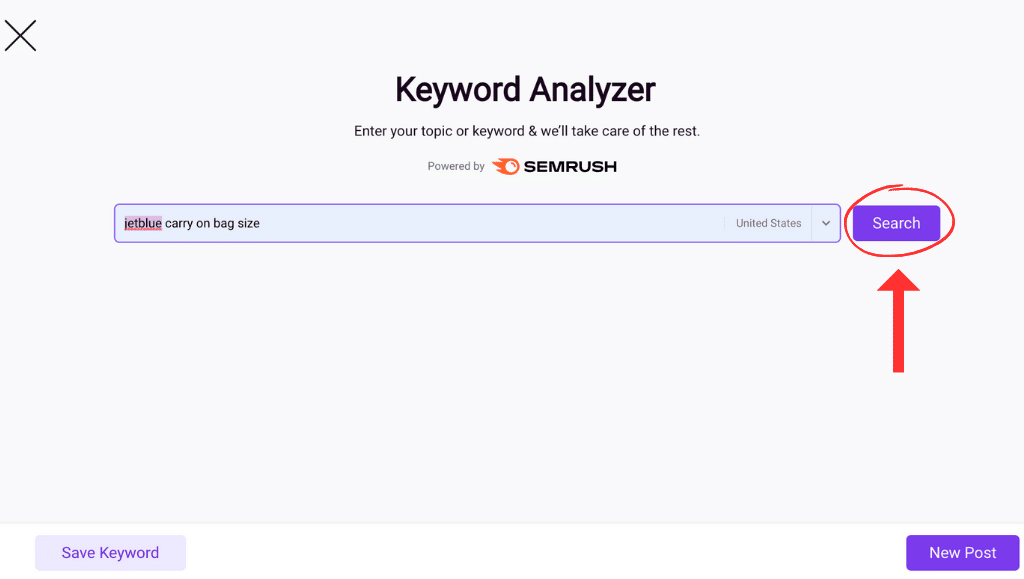
4th Step: Type in your desired keyword then hit SEARCH.
🔍 Find Keywords That Actually Drive Traffic
Stop guessing and start ranking. Discover high-value keywords, analyze trends, and dominate your niche free and fast.
5th Step: Review the keyword results and see if they are worth writing about.
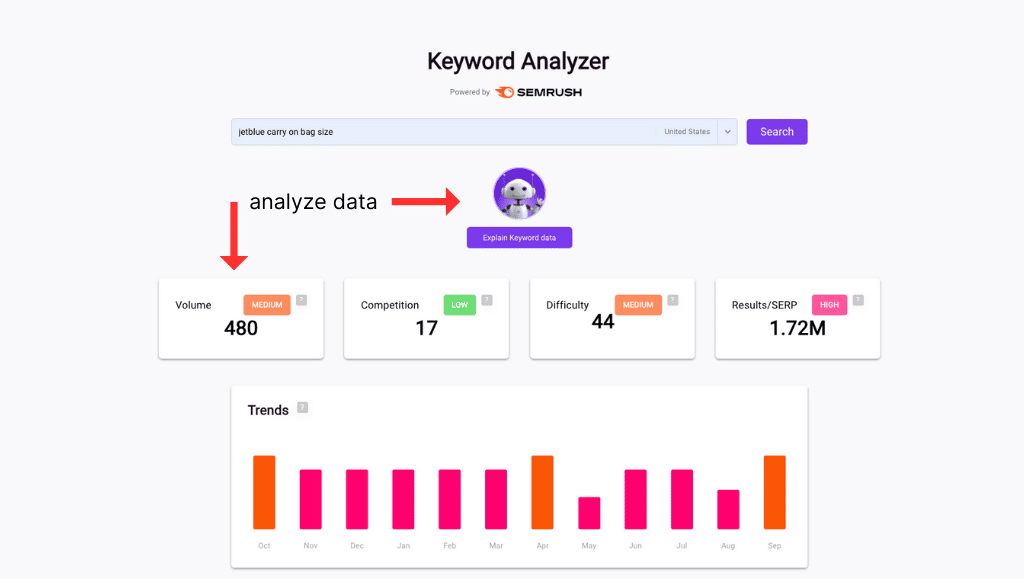
Please refer to our blog post on the importance of keyword research here, as well as the video tutorial below.
Pro Tip: Review the Keyword Tutorial to see how to maximize your keyword experience.
6th Step: Take a look at the Secondary Keywords to add to the article.
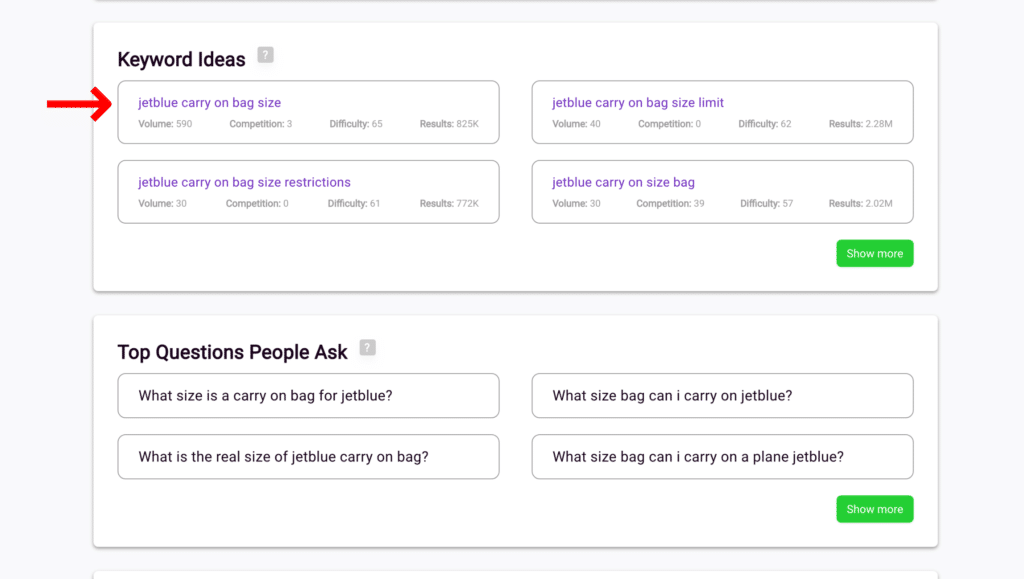
This will tell you the additional subject matter that readers will need to know in order to make your content complete.
For instance, I will add “JetBlue carry-on bag size restrictions and JetBlue carry-on bag size limit” to my article to help flesh it out.
7th Step: Look at the other questions people are searching for.
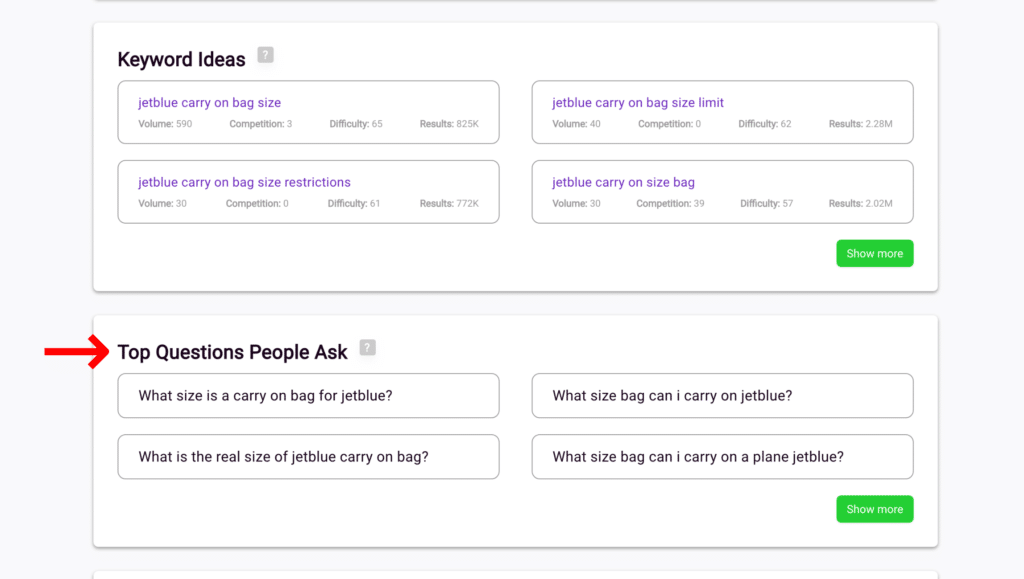
This will allow you to address specific questions in your articles and possibly get featured in Google’s “People Also Asked” section. Doing this will help increase your chances of getting more traffic to your website.
For instance, I will add “What size is a carry-on bag for JetBlue?” to my article.
8th Step: Make better content.
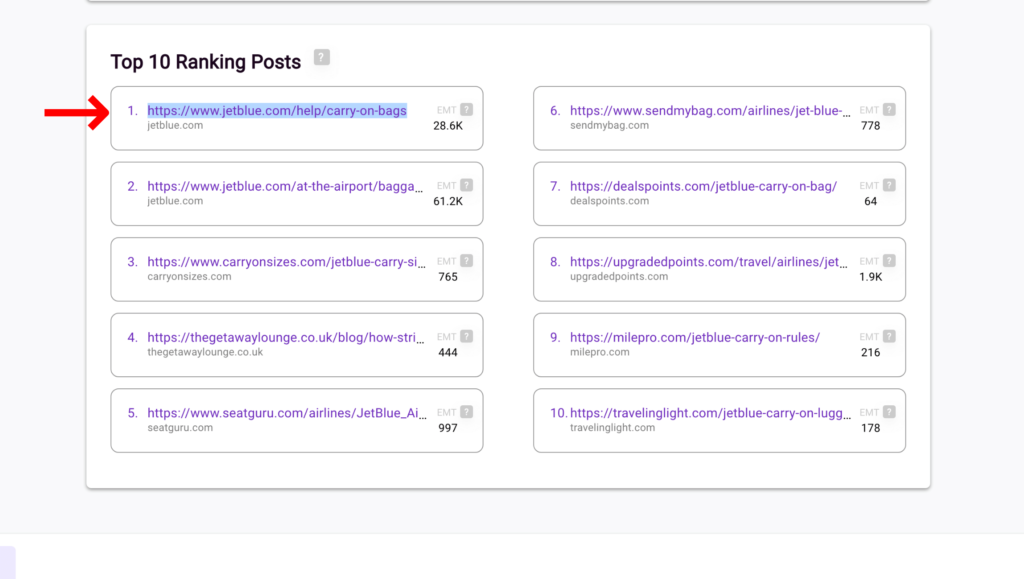
You will then look at your competitors to see if there’s any room for you to improve on the content they’ve created and make an even better guide.
9th Step: Once you’re happy with the keyword, you’ll select NEW POST
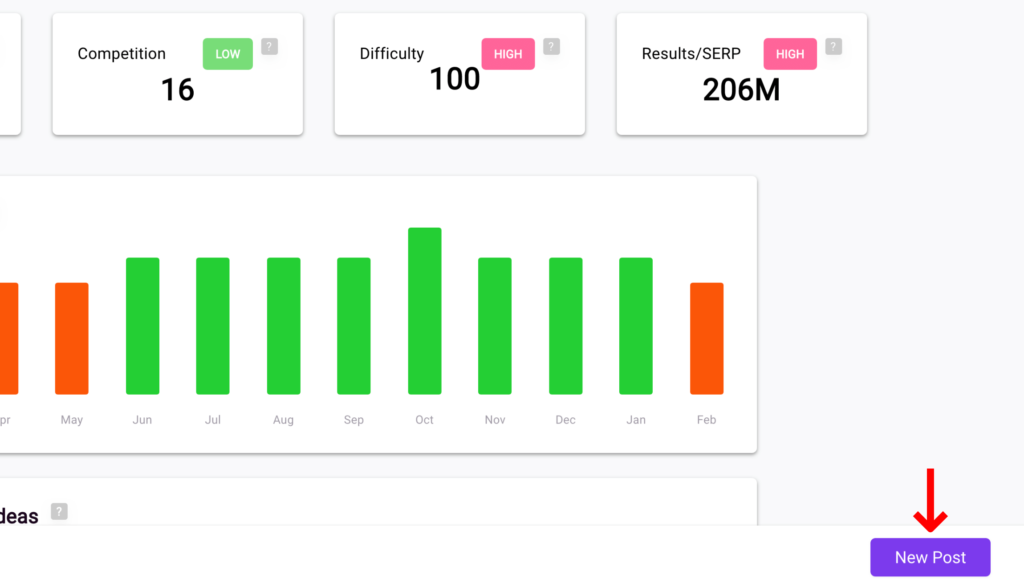
You’ll then receive a message letting you know if the keyword is good for Bramework’s AI to assist you.
10th Step: Begin building your blog post by generating a title.
You’ll then be sent to the Blog Post Builder. As you enter this area, you’ll notice that everything will look blank, but it’s not.

Our AI Writing Assistant is ready for you, so let’s first start with the title.
11th Step: Know what each icon means on Bramework.
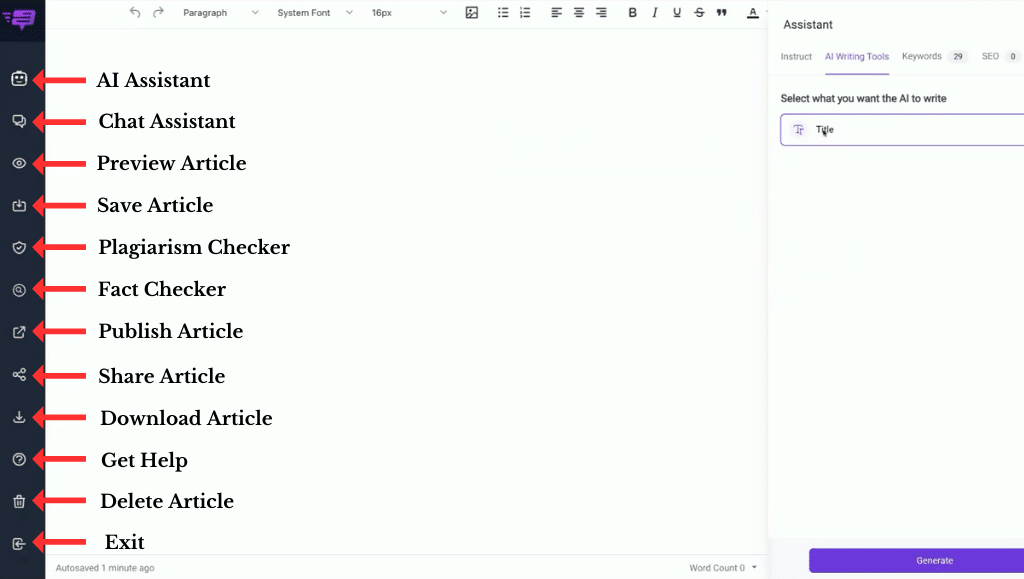
These are the Bramework icons on the left side of the panel that you should be aware of.
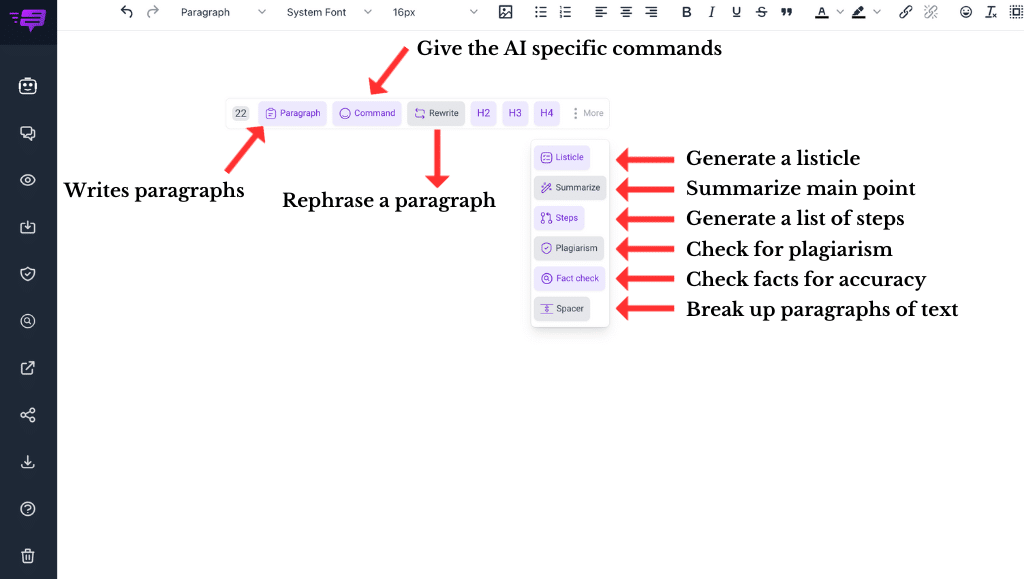
These are the icons for the various AI Assistant Features.
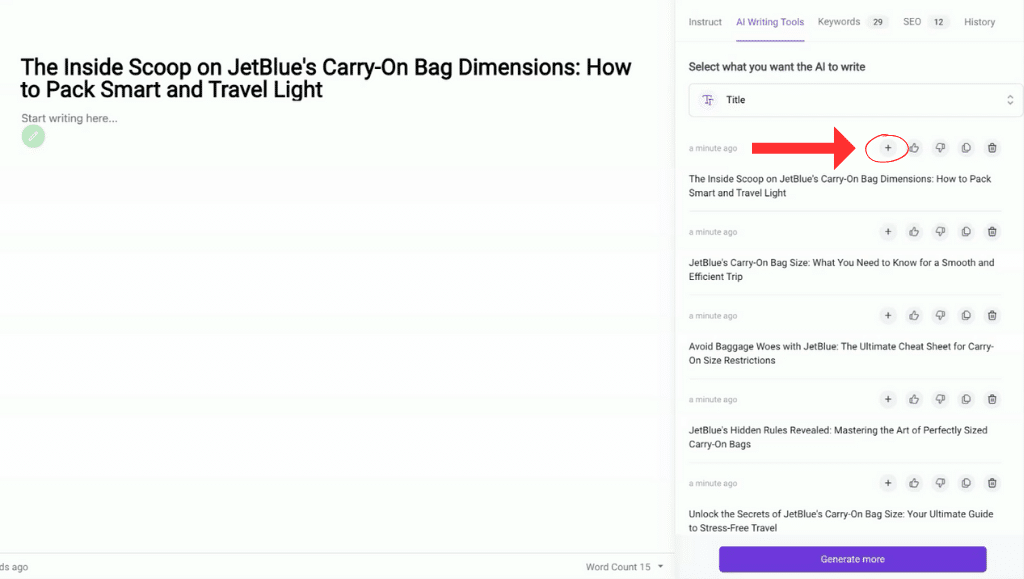
12th Step: Select the title generator from the AI Writing Tools.
Use the AI Assistant to help you create a title.
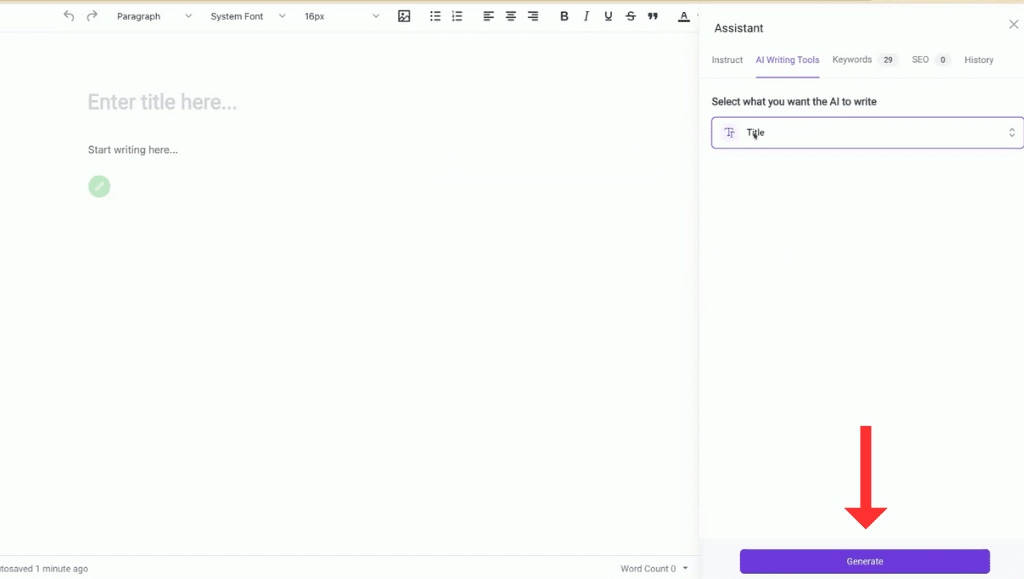
You’ll do this by hitting the GENERATE TITLE button to bring up your click-worthy headliner.
13th Step: Hit the plus button to add the Title to your post or select GENERATE MORE if you don’t see a title that you like.
Pro Tip: Although Bramework automatically saves your article, I always like to hit SAVE throughout my writing process just to be on the safe side.
14th Step: Start Writing
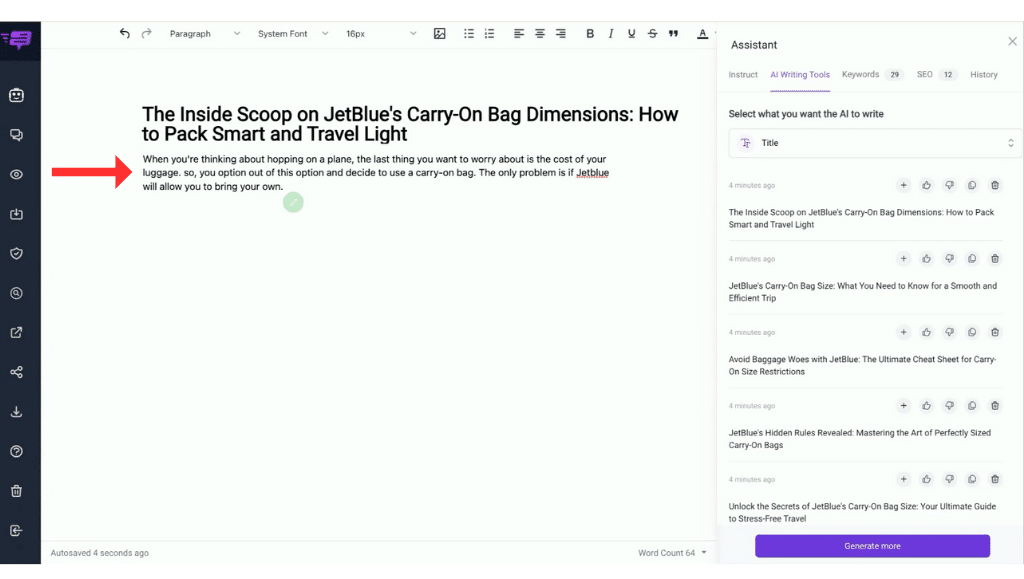
Now that you’ve made it this far, I’m going to go through a sample article with you and show you how I create an article with Bramework.
I always start out the first sentence with the problem of the reader that I write myself. It helps the A.I. Assistant know how to help you better with the guide and to generate better content for you.
Pro Tip: Before you get started with any piece of content you write, you should ALWAYS research the topic prior to writing with Bramework. This will make your process go much faster.
15th Step: Go to Outlines and select GENERATE to get the foundation of the blog post.
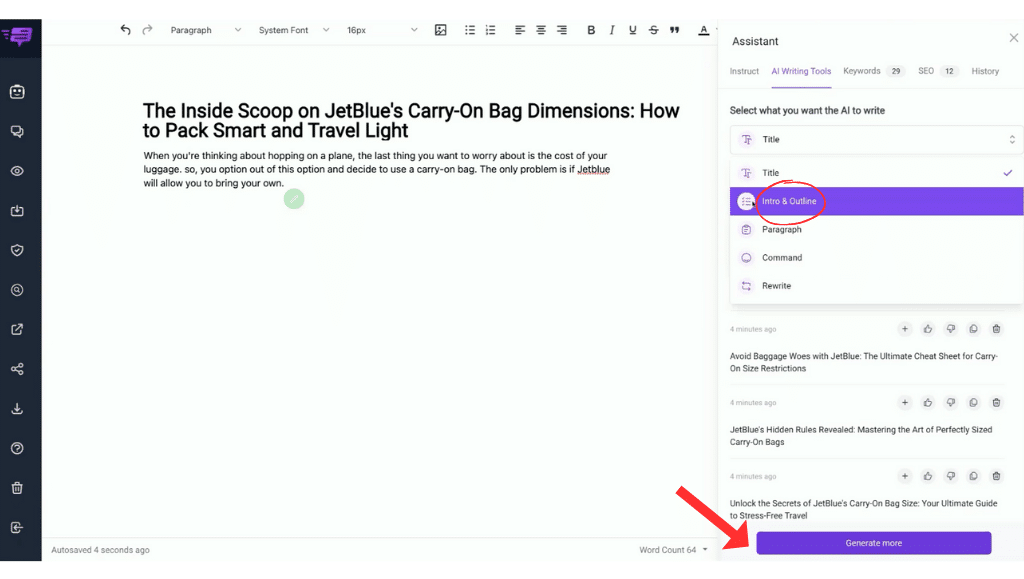
I’m pretty happy with this outline, so I will use the introduction to help strengthen my own first sentence.
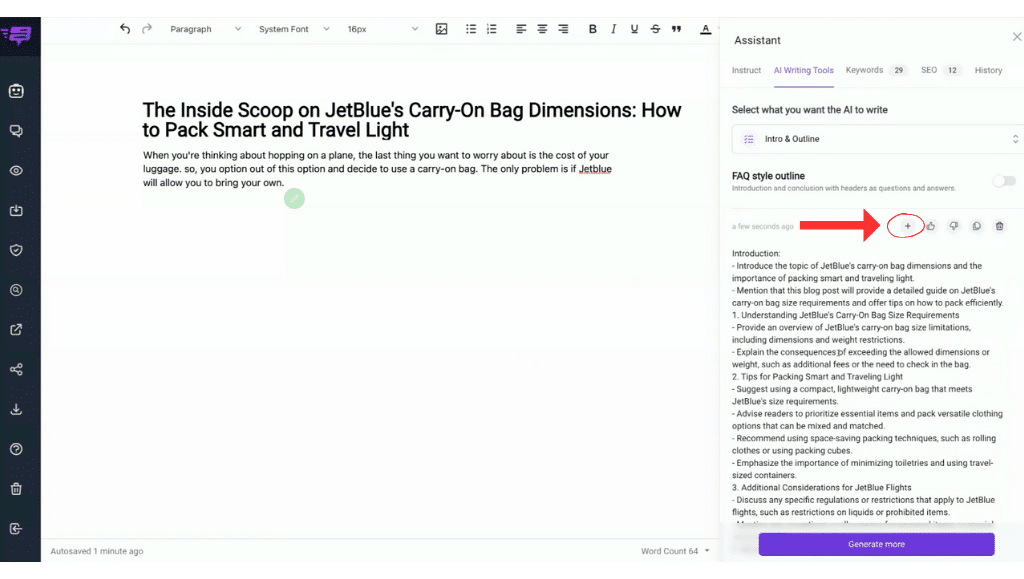
Pro Tip: ALWAYS make the article personable and add your own voice and tone that’s reflective of your website.
16th Step: Fact check the information.
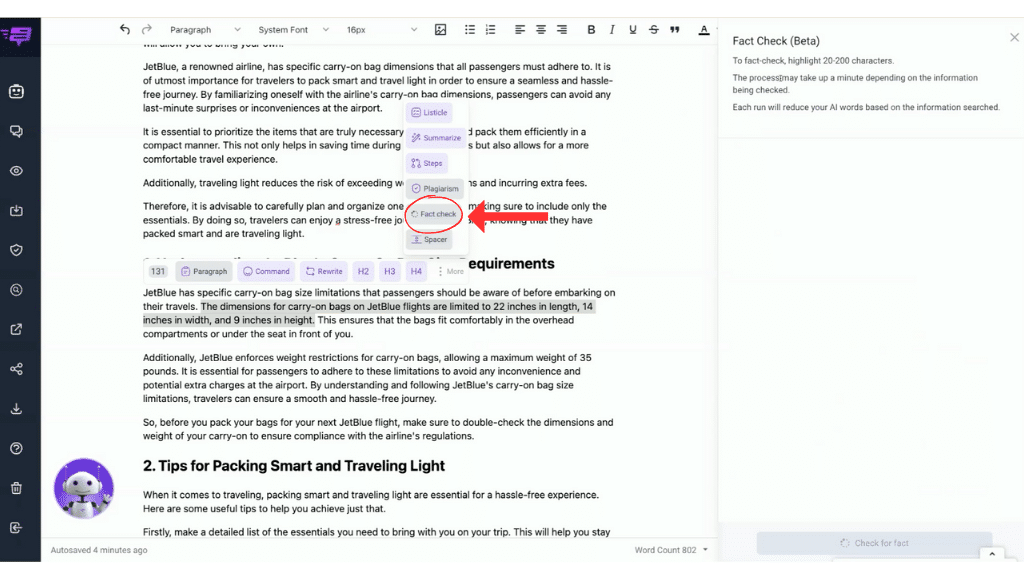
As you can see, this article will required me to look at the current guidelines of the airline that I’m doing research on to make sure that the information is as accurate as possible.
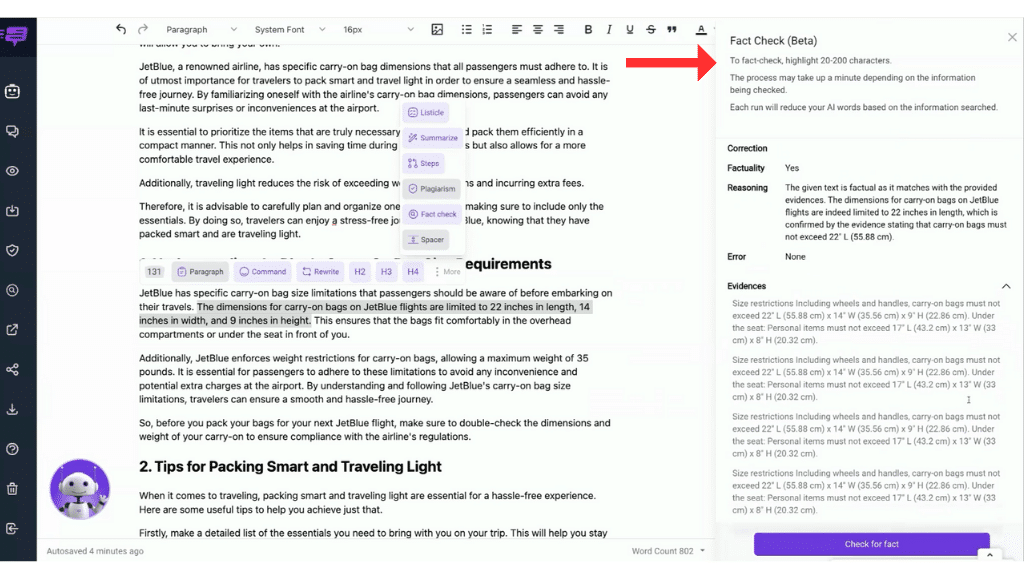
Pro Tip: You ALWAYS want to do your OWN research on anything you share online. NEVER use the information from the AI alone. Remember that Bramework is here to assist you, especially in the moments when you’re having writer’s block and the words are not flowing easily to you.
When it comes to hardcore facts, numbers, and statistics, ALWAYS double check the information before publishing your blog post. This is something that I will keep emphasizing to you so that we can all continue to create high quality content.
17th Step: Correcting any misinformation.
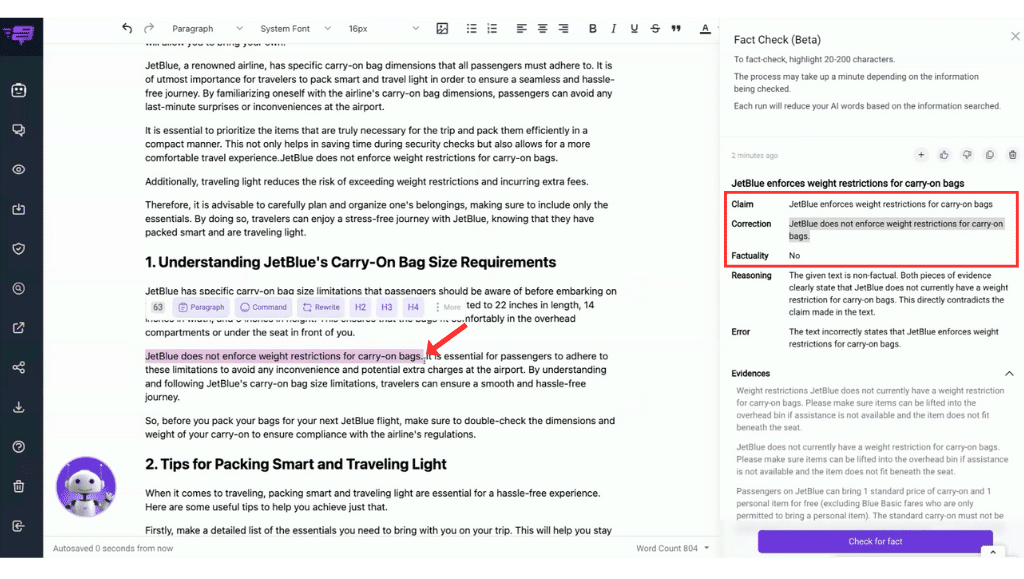
After I did my research, I corrected the mis-information on this post and added my own voice to the paragraphs.
18th Step: Continue to expand the article.
As you can see, the more research I did, the more sections I added to help improve my article along with the help of the AI generated content.
19th Step: Use the additional Bramework features.
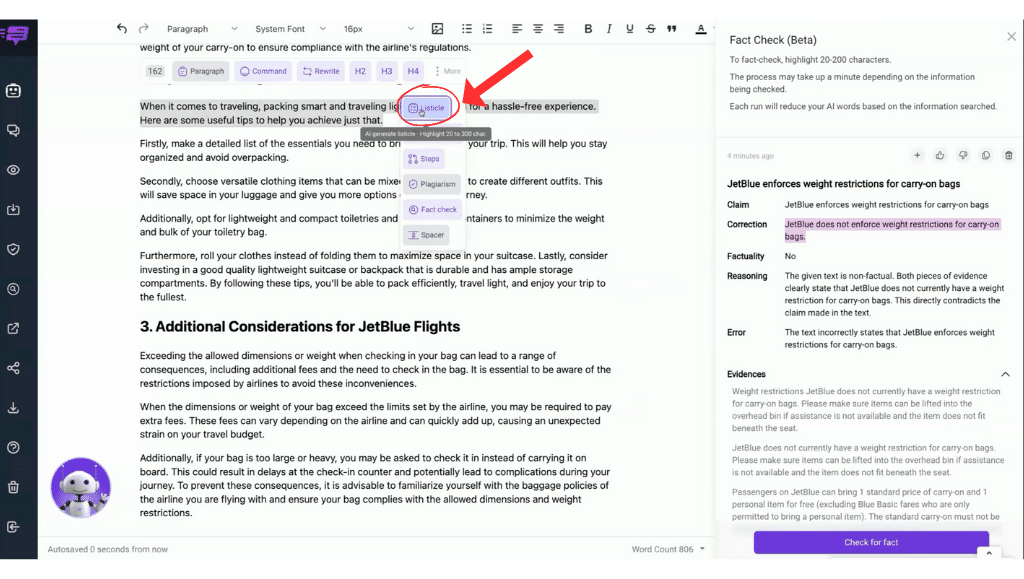
The Bramework assistant is giving me ideas on how to create a well-rounded guide with the suggestions coming from the “FINISH SENTENCE” option and the “LISTICLE” option.

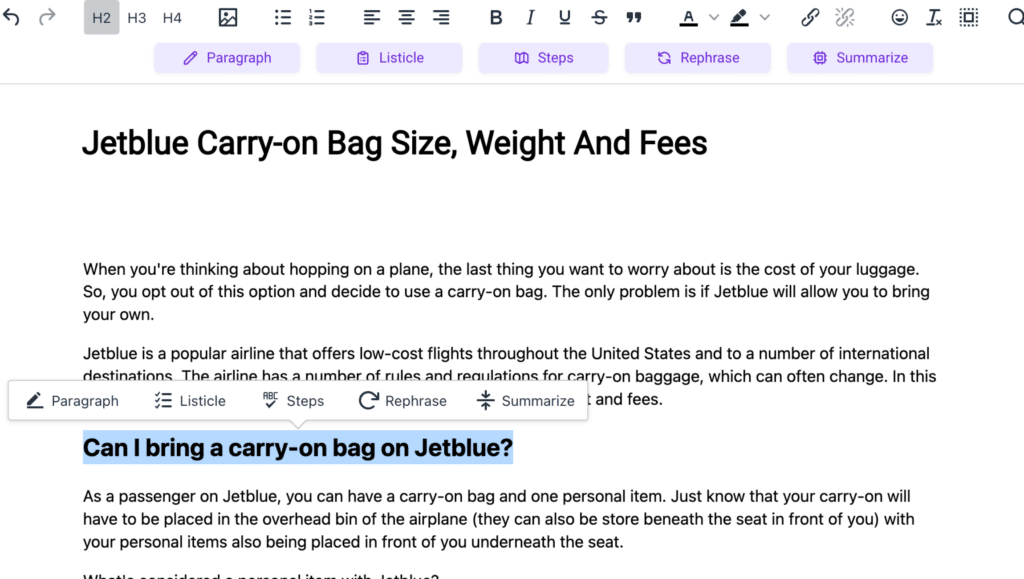
Now I can also highlight a paragraph that I received from the AI Writing Assistant and I can hit “REPHRASE IT” to give me a different interpretation.
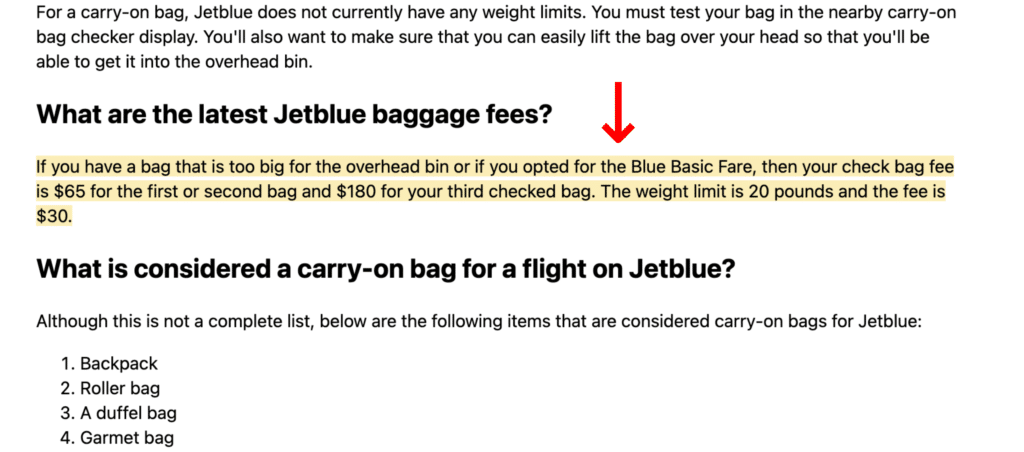
As usual, I will still rework the paragraph to add my own voice to it and to add any additional information that I feel is needed.
20th Step: Improve your article.
As you can see, redoing this section made me ask another question that I felt like the reader would need to know: “What’s considered a personal item?”
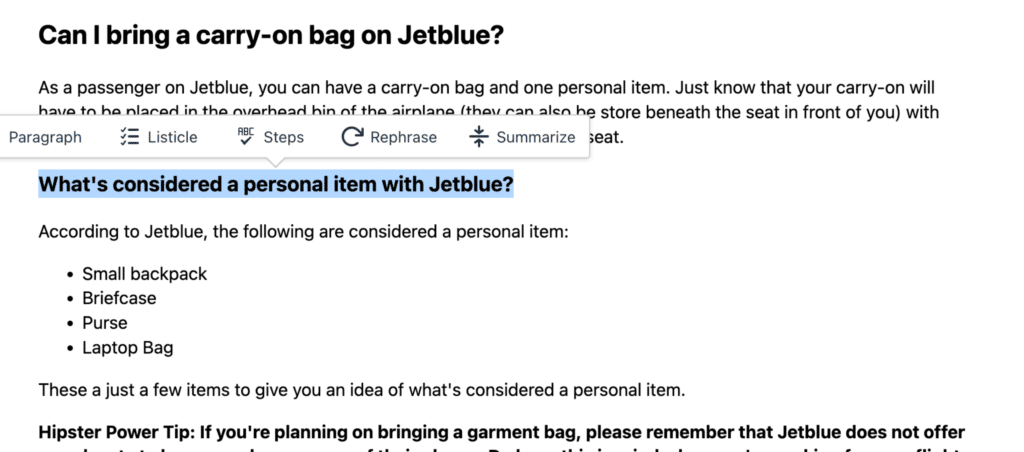
This is a question that I did not think about before I got started with this guide. As I continued to work on the article, I realized that this would be a great addition to the blog post.
So, you’ll ALWAYS want to continue to think of ways to enhance your article using Bramework to help spark more creative ideas for your blog post.
21st Step: Finish your first draft.
As you can see, I’m officially done with my first draft.
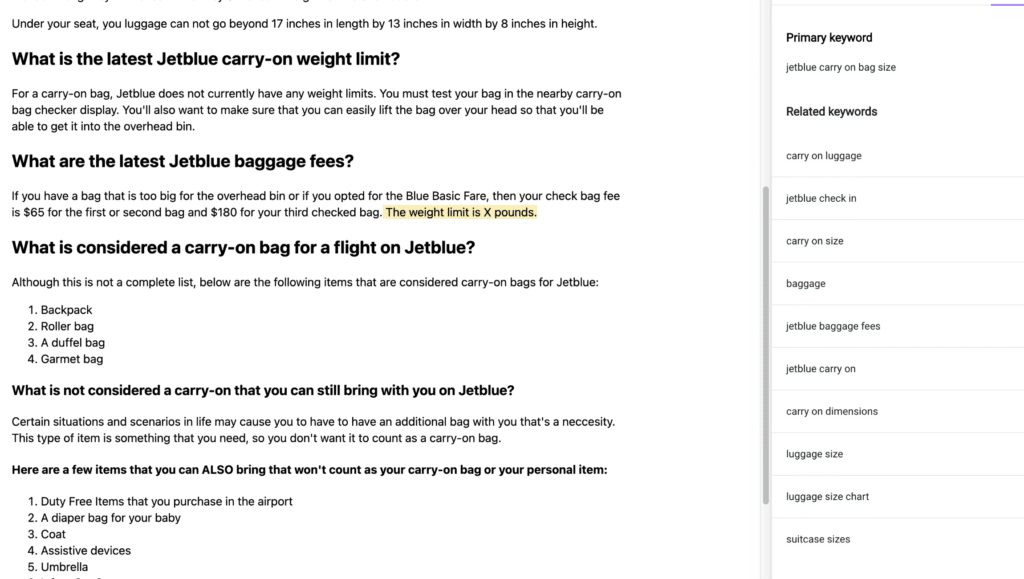
Now I’m going back through, cleaning up the article, adding Headers and spacing out the paragraphs to make it easier to read for the website visitor.
Take a look at the importance of Headers here.
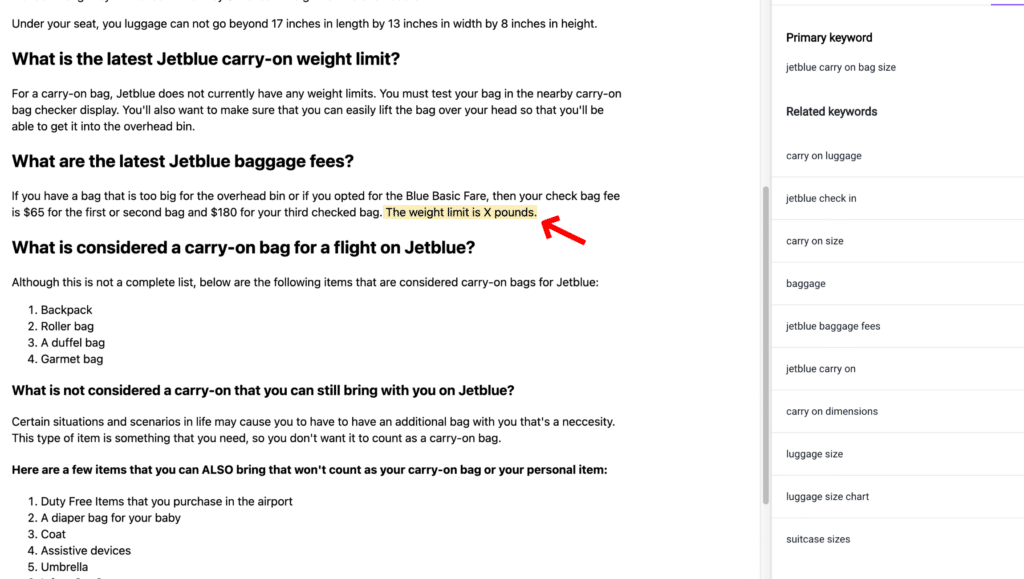
22nd Step: Make your final edits.
Look at the area below that I highlighted. I did this to remember to go back over that content and to double check it. These were also places that I wanted to re-write until it was to my liking.
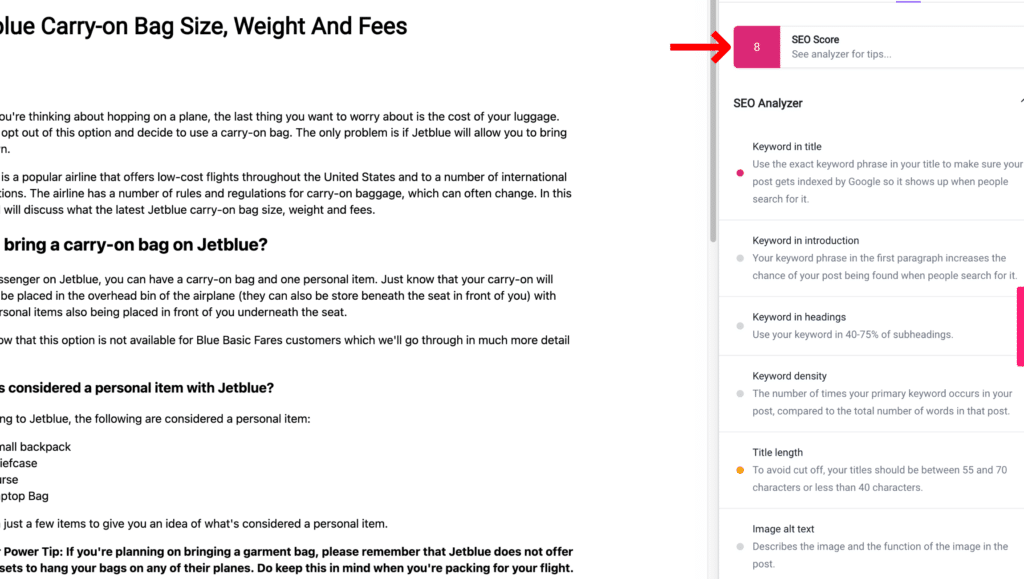
23rd Step: Use the SEO Analyzer.
As I go through my final checks, I review the SEO Analyzer to see if there are any opportunities for me to improve the guide for a higher chance of ranking on a search engine like Google.
24th Step: Add Secondary Keywords to your blog post if they naturally fit.
You can easily add the Keywords using the plus sign to your article and begin to write with them throughout the article.
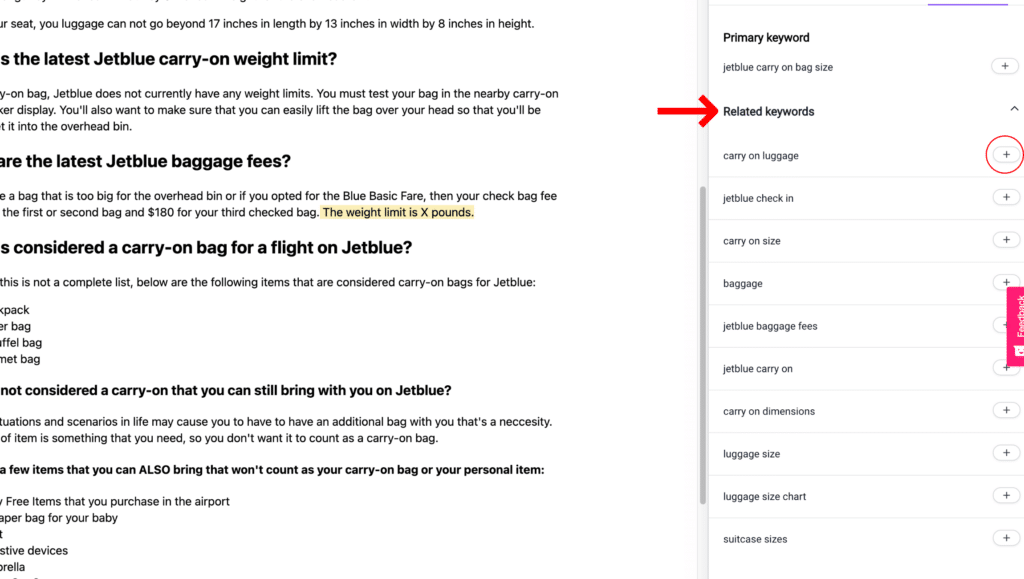
This feature also makes sure that you don’t leave out any good secondary keywords that may help your article be found on the web.
25th Step: Add a Featured Image.
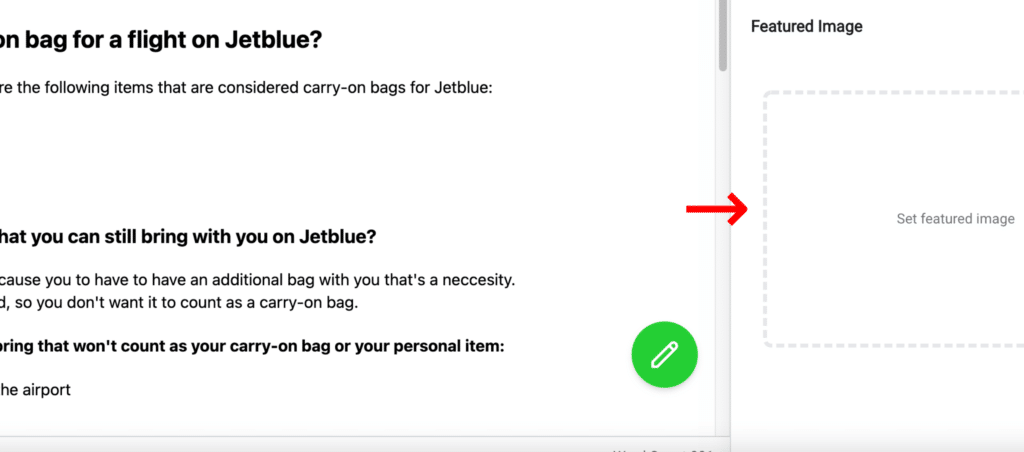
Now that I’m happy with my work, I can add the featured image.

To add the Featured Image, you’ll type your keyword into SEARCH.
26th Step: Select your Featured Image.
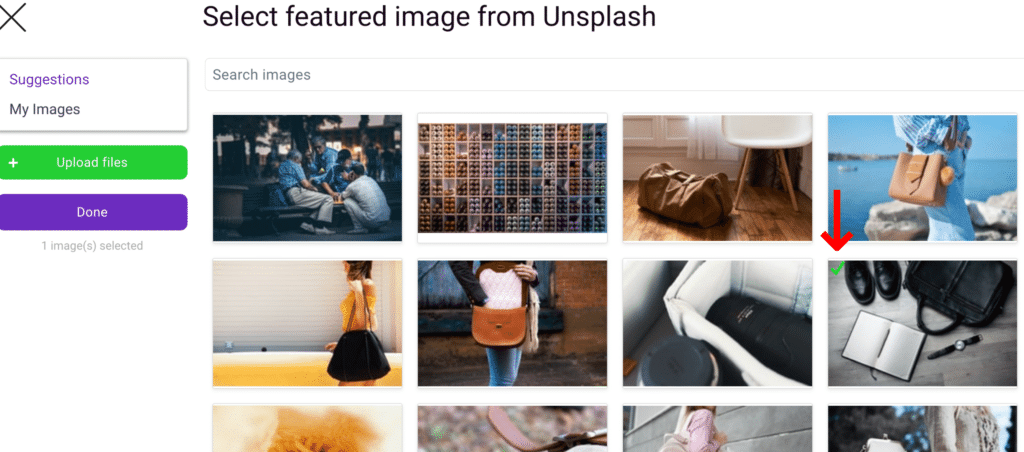
Next, you’ll select your favorite image from the list or you can upload your own image.
27th Step: Hit DONE.
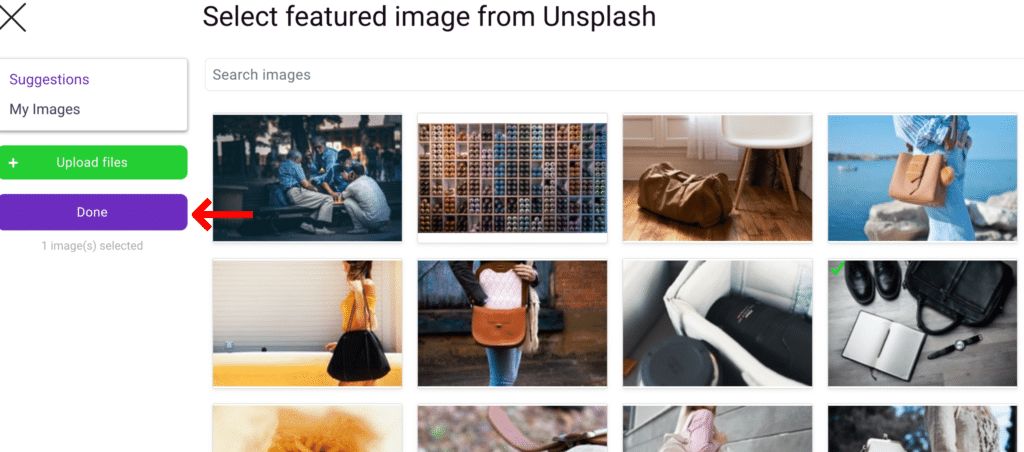
The Featured Image will now appear here.
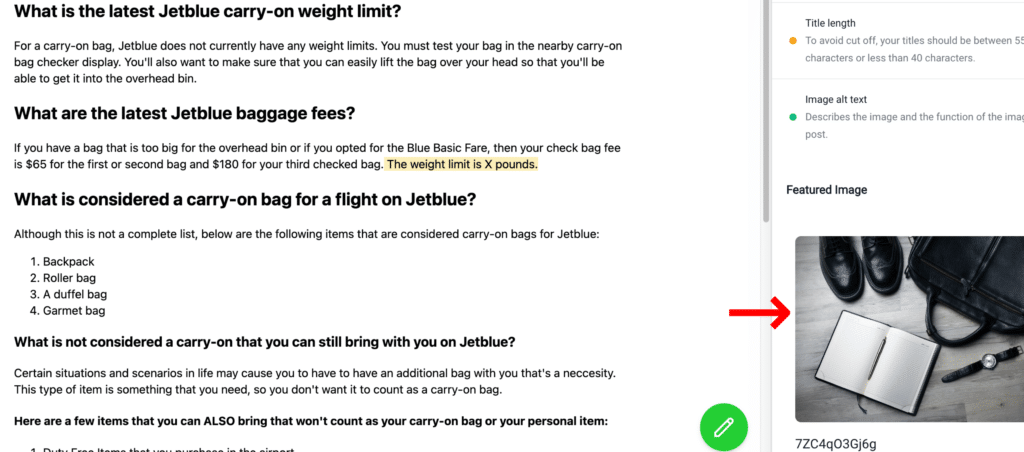
Pro Tip: At this point, you can review your article with Bramework or in your favorite plagiarism checker to make sure that your blog post is unique.
28th Step: Be sure to select PREVIEW to see if you like the finished product.
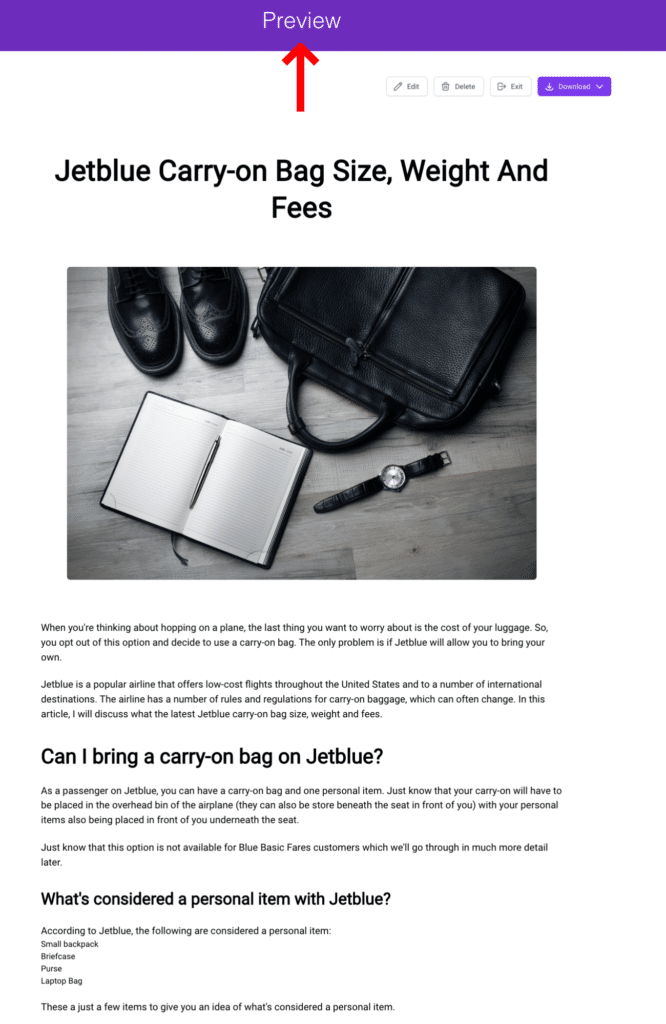
29th Step: Export your article.
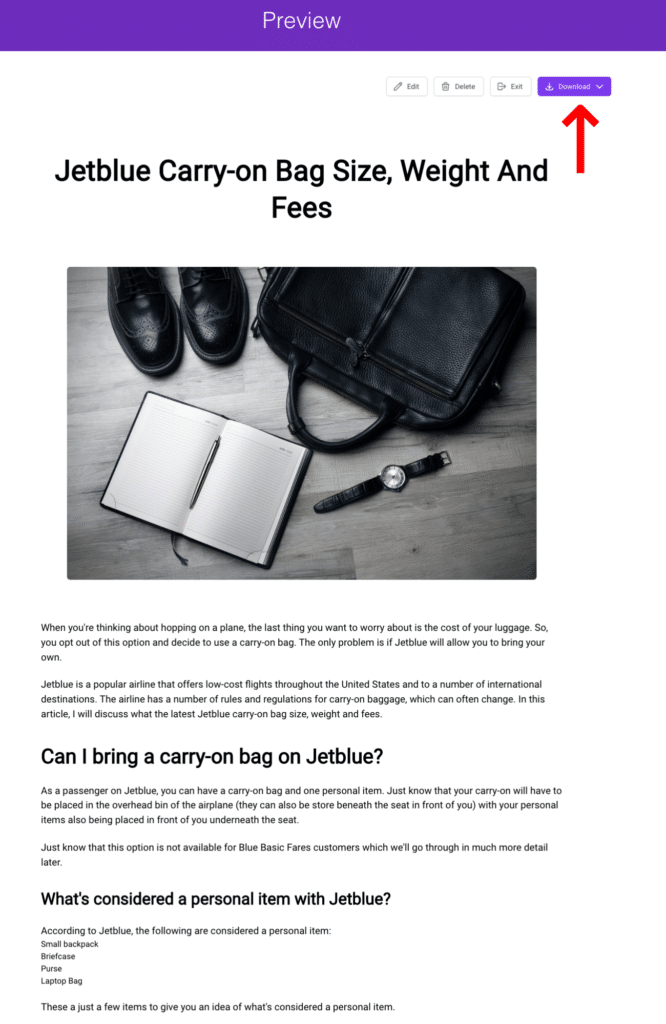
You can choose to export and download using one of the following options:
- HTML
- DOCX
- TXT.
Pro Tip: I like to hit SELECT ALL, the COPY, then PASTE into a Google Document for me as my own way of backing up my work. You can also save your article in Bramework.
Wrapping Up…
There you have it! You have officially begun your blog post creation. We hope this tutorial has helped you create your BEST article using Bramework’s AI Writing Assistant.
UP NEXT: How to Create a Click-worthy Blog Post Title Using the Bramework Title Generator?
🎓 Join the Ultimate Blog Ranking Academy!
Unlock the Secrets to a $10,000 per-month Blogging Income


